Wednesday, April 30, 2014

Review: ARTistic Pursuits


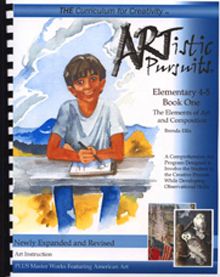
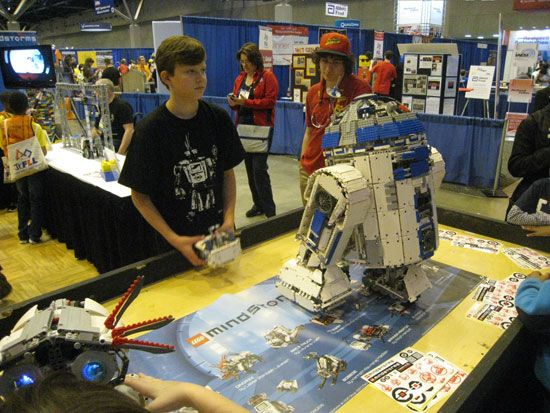
When the Homeschool Crew  reviewed curriculum from ARTistic Pursuits last year I did not participate.  This year though I was looking for a way that my son could strengthen his hand and finger muscles without the drudgery of writing, writing writing.  I also hoped he would grow beyond his “stick figure” drawing style.  We received a copy of Elementary 4-5, Book 1: The Elements of Art and Composition.

A little background before we dig in—I never liked art time in my own public school education. After mandatory art class in elementary school I never opted for art as an elective, unless you count theater or music as performing arts. I’m decent enough at crafts (quilting, needlework, stenciling) but not drawing or painting. My Schnickelfritz used to draw occasionally (usually with both hands at once), up to age 4 or 5. Now he prefers to make his artwork by laying out Jenga blocks on the carpet to form outline shapes of his subjects. He’ll go through phases where he’ll draw outline maps of states (and he’s pretty good at that). When he has to draw for notebooking in Bible or science, his work is the stick figure style. Another concern of mine is his perfectionist tendencies – would he be discouraged if his drawings didn’t look as good as the samples in the book.

The comb-bound book (92 pp.)  has 16 Units, each unit containing 4 lessons.

  1. Space
  2. Line and Shape
  3. Texture
  4. Value
  5. Form
  6. Form using Value
  7. Local Value
  8. Contrast
  9. The Shapes of Natural Forms
  10. Edges
  11. Balance
  12. Rhythm
  13. Overlap
  14. Depth
  15. Proportion
  16. Movement

The first lesson in each unit introduces the subject and gives new vocabulary terms. In the second lesson the student studies a full color image of famous piece artwork to see how the artists incorporates the unit concept. This lesson also includes a brief biography of the artist and some insight into the time the painting was created.  Lesson 3 gives the student more instruction in how to apply the concept to his/her own drawing.  Lesson 4 is a final project with samples of other students’ work, (but every lesson includes a drawing exercise).


How we used it:

The author writes directly to the student so Schnickelfritz did all the reading himself.  While he read I gathered up the supplies he would need and helped him find suitable subjects to study for his own drawings (most of the exercises involve studying objects placed in front of them rather than drawing from imagination).  We incorporated Art into our schedule two days per week so one unit took two weeks to complete.

What we thought:

The book was great at explaining concepts and giving us actual works of art to study – We’ll probably keep it when were doing Art Appreciation.  However, my son found the drawing exercises VERY frustrating.  For example, the very first assignment was to look closely an object and draw the edges of the object while looking closely at the object.  Schnickelfritz kept his eyes on the blue bottle and when he looked down at his paper one side was longer than the other, the edges didn’t line up, etc.  He got so mad at himself that he crumpled up the page and declared himself the “worst drawer ever.”  I said he could probably glance at the paper occasionally, but he insisted on following the directions literally and they hadn’t mentioned looking at the paper.

Here is a second example of his following exact directions.  The text says “Move your pencil in a tiny circle to make a dot. Make them big, small, light or dark.”  Well he certainly has big and little, light and dark dots, but there was no direction explaining where to place the dots to make the star fish appear dimensional (You can also see where he erased his first attempt in frustration").


I think my son would benefit more by watching someone drawing and copying their steps.  This book may be more appropriate for a child that has already displayed some artistic talent and just needs some guidance refining it. 

Elementary 4-5, Book 1: The Elements of Art and Composition  is for ages 9 and up and retails for $47.95.  The book is non-consumable so you could save and use it with younger children.  For your convenience, ARTistic Pursuits has teamed up with Dick Blick for one stop shopping of all your necessary tools and art supplies.   I found everything I needed except the Ebony pencils at my local craft store (small rural town so big cities may have those too).

 
Click to read Crew Reviews

Monday, April 28, 2014

Review: Missionary Stories in Radio Theater format

Okay, most Americans don’t spend their evenings sitting around the radio listening to the Lone Ranger any more…but don’t think for a second that “radio theater” is dead.  Take for instance our latest review item: Season 2: Episodes 13-24 from The Brinkman Adventures.

Rather than coming over the airwaves, we listened to 12 episodes of The Brinkman Adventures (over 5 hours) by popping 4 CDs into our car or home players.  We were introduced to the Brinkman family (fictional name)—a homeschooling family that performs Christian concerts and interacts with missionaries around the world.  Sometimes the adventures are their own (racing through Mexico to a concert in Belize with a crate of chickens on the back of the bus) and sometimes they listen to the stories of the missionaries they meet (one shared God’s amazing provision of a church/school building in communist China). 

Names and countries may have been changed to protect those still in the field, but the stories all have a basis in actual events (especially the parts describing God’s protection and provision).  After listening to the stories we could visit the Brinkman website and learn more about the real stories.

We live in a very rural area and have a fair share of time in the car to run errands, but listening to these stories made the time fly.  My Schnickelfritz wasn’t patient enough to wait for the next trip to learn what happened next so the Brinkmans became his just-before-bed audio entertainment. 

His favorite story was the Pirates of Mayan Island—not that he’s part of the modern pirate craze, but for the series of unfortunate accidents that hamper the pirate’s caper. Although the island and the Mayan temple are real, most of this adventure was fictional.  His least favorite stories were the two parts of Sapphire Slaves.   His tender heart broke at the thought that some children are still held in slavery in this day and age.  (There is a warning  at the beginning of the story for children under 10 to listen with their parents).

My son loved the adventure portions, both the humorous and the perilous –chasing down chickens, held captive by pirates, etc.  I was pleased to hear how God takes care of his own – a women in a blue hat leads three missionaries to a private compartment on a train and a note directs the kitchen to provide them with food but no one else sees the woman.  On a separate trip, the family is prepared to sleep on their bus when a total stranger approaches and says “God loves you” and leads them to a penthouse suite in a beachfront hotel.  I loved for my son to hear that God still performs miracles today.

Just like old time radio adventures, the stories have sound effects and a cast of  actors.  The Brinkman kids are played by the real brothers and sisters of the family (even the youngest with their sweet voices).  The parents and the people they encounter are played by actors and I’ll admit I sometimes had trouble understanding the accents of some of the foreign characters, especially in the stories about China.  It could just be my middle aged ears because my son didn’t complain.  Speaking of actors, the woman who portrays the mother just lost her husband to a heart attack over the weekend, so please lift her up in your prayers.

We were introduced to the Brinkmans in their second season, but I didn’t feel like we had missed any vital information not having heard season one.  I would suggest listening to the episodes in order because some story lines carry over from story to story.  If you’ve got a road trip in you summer plans, these stories would be great to listen to along the way.  They can be enjoyed by all ages (but do heed the warning for those under 10 to listen to certain stories with their parents).

Season 2 is available on CD ($25) or MP3 ($17).  These prices are suggested donations so don’t feel they’re too expensive if your budget is tight and consider blessing this missionary family with more if God has let your cup runneth over.

Click to read Crew Reviews

Saturday, April 26, 2014

FIRST Robotics Championships 2014

Spring has arrived in St. Louis once again which means we headed downtown to watch the FIRST Robotics competition again – if you missed it this year it will be in St. Louis through 2017. 

At the MetroLink Station we found another of the 250 birthday cakes celebrating the founding of St. Louis in 1864.  Let’s see 8 found, 242 to go.  We may need to visit the city more often.

First stop in the pits was the Lego display (the sponsor the youngest two divisions), what’s not to drool over—like this working model of R2D2.

R2D2 was reserved for the exhibitors, but Schnickelfritz got to drive this MindStorm robot through a maze, controlling it with an app on a smartphone.  When he finished the challenge they gave him a mini-figure.


Speaking of Legos, the First Lego League had contestants from around the world.  In addition to their displays on the competition subject (severe weather), many made cultural displays—like this team from Taiwan dancing.  Looks like we can log some time to social studies as well.

Not all the exhibitors were strictly technology.  This chef from the Culinary Institute was making Dragon’s Breath mousse in a bowl of liquid nitrogen.  When you put it in your mouth, you could breath vapor. (And it tasted really good too)

You had to be careful walking around because you never knew what might come rolling at you feet or whizzing past you head.  Then you had to look around to find the person controlling the thing.  This hovercraft was particularly cool because it could flip over and still keep flying.

Somewhat off topic, but when we moved from the Convention Center to the Dome we finally got to see the new bridge over the Mississippi.  They offered tours while they were building it, but they filled up before we got our names on the list.

Of course the big draw is the competition.  Alliances made up of three robots each try to pass and shoot giant balls across the court.  The four divisions are all named after renowned scientists: Curie, Archimedes, Newton, and Galileo (which we always follow).   The finals take place on the Einstein court.  The last two years the Galileo alliance has won the finals, but they weren’t able to complete the hat trick.  Congratulations to the Curie alliance for finally breaking the curse.

Friday, April 18, 2014

Rescued Book #15: The Swamp Fox of the Revolution

The key figure in this week’s rescued book may be more familiar than most participants in the American Revolution thanks to a little film called The Patriot.  Mel Gibson’s character was a mash of at least two generals—Dan Morgan and Francis Marion, both of whom appear in the Landmark title.  The antagonist in the book, Col. Tarleton, head of the British cavalry was referred to as Tavington in the movie.  So let’s compare and contrast the film with this weeks rescued book…..


The Swamp Fox of the Revolution 

Holbrook, Stewart Hall, and Ernest Richardson (illus.) New York: Random House, 1959. 180 pp.

Similarities:

  • Marion was a veteran of a campaign against the Cherokees during the French and Indian War and was elected captain of his regiment.
  • His headquarters were in the swamps between the Santee and Pee Dee rivers.
  • His was the only remaining  force standing between Cornwallis and Washington’s armies in the north.
  • He did rescue captured American troops being marched away by British forces but instead of just being 1 person (his son in the movie) it was nearly 150 soldiers from Maryland.
  • Marion’s troops did attack British supply wagons and steal their food and ammunition for their own use.
  • Several buildings on Marion’s planation were burned by the British while he was away, not necessarily his house.

Differences:

  • Marion began to muster neighbors to join the fight upon his return from the vote to raise three regiments of militia in 1775 –at the beginning of the war, not after the siege of Charleston.  In fact, he might have been captured at Charleston if he hadn’t left the city to convalesce after breaking his ankle. 
  • The militia that fired two shots before retreating at the Battle of Cowpens was led by Dan Morgan, not Francis Marion.  Mel Gibson’s character was based on both men.
  • Francis  Marion and his men were not present at the Battle of Yorktown.
  • Francis Marion did not have any children at the time of the war.  At age 50, he married a spinster cousin.
  • Marion was a general, not a colonel.

The real Francis Marion was no Mel Gibson—he had a small, almost frail figure, he limped from the broken ankle, and was very soft spoken.  A member of his brigade summed him up as being “part rawhide and part vinegar, wrapped around the biggest heart on the Continent.”  Any boy would love reading about his exploits in this book.

My copy of The Swamp Fox of the Revolution is in desperate need of first aid.  The day I brought the book home from the Greater St. Louis Book Expo, I set it on the floor and my dog started to eat it!  Turns out the glue in old books contains sugar so it smelled like a treat to my otherwise good dog Della.  Take my experience as your warning – books belong on shelves when not being read, not the floor.

You can find a list of all my Rescued Books here.

Thursday, April 10, 2014

Review: Star Chronicles

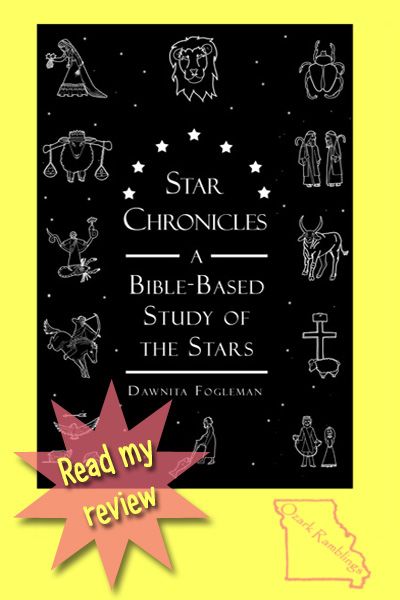
My husband, son, and I could be described as a Dark Sky Lovin’ family.  In the summers my husband teaches our son to find the constellations with his laser pointer, in the winter we bundle up in ski gear and sleeping bags to watch the Geminids meteor shower, and next week we’ve got an all-nighter planned to observe the full lunar eclipse.  One thing we’ve noticed when we meet up with other star gazers—the great majority of them talk more about Carl Sagan than the Creator of the Universe.  So when we learned of the opportunity to review a brand new, God-honoring astronomy resource we jumped on it.  Homeschooling mom, Dawnita Fogleman’s new publication is entitled  Star Chronicles: A Bible-Based Study of the Stars.

WE received a PDF downloads of the book, coloring pages for the young (or young at heart), and notebooking pages for older students.  Additional materials needed would be a Bible, a scrapbook or notebook to hold the journal pages, coloring & decorating supplies.  If you actually want to go outside and view the constellations you’re studying, a field guide or star locator would come in handy.  I printed out the notebooking pages and then transferred the files to my Kindle for easier reading.

The book is organized by the 12 constellations of the Zodiac which most readers will be familiar with, although the author stresses that this is NOT about astrology.  In fact, the chapter have titles like The Goat or A Bull instead of Sagittarius and Taurus.   Each lesson includes the title constellation and a handful of neighboring star patterns.  If the constellation (or stars within the constellation) are mentioned in the Bible, the author will focus on those verses first (using the King James version).

Seek him that maketh the seven stars and Orion, and turneth the shadow of death into the morning, and maketh the day dark with night: that calleth for the waters of the sea, and poureth them out upon the face of the earth: The LORD is his name:  Amos 5:8

In other cases, it is the picture represented by the stars that we can use as a spiritual reference.  Virgo is a virgin—this can lead us to discussions on the virgin birth, the parable of the wise and foolish virgins, etc. Or we can expand the idea to a virgin bride and discuss the Church as the Bride of Christ.  The author shares that Virgo is the first constellation in the Jewish New Year and prominent during the Feast of Trumpets.  Aries, the ram (a male lamb) is seen in the sky at the time of Passover, when male lambs are sacrificed –coincidence, I think not.

Sometimes the book really has to stretch to find a Biblical connection…Cygnus is a picture of a swan and to quote the text “there are no swans in the Bible, but another beautiful bird that is in the Bible a lot is the dove.”  I think it would have been fine to leave that constellation out if we couldn’t find a good tie in. 

Sometimes I think this stretching exercise could actually be misleading. Case in point-- the discussion on Canis Minor.  The text says “The largest star is actually a star system named The Carpenter.”   If you called it that in a conversation with other star gazers, they would have no idea what you were talking about because its common name is Procyon.  Even Wikipedia (which the author used for a lot of her research) cites “in Babylonian mythology Procyon was known as Nangar the Carpenter, an aspect of Marduk..” [emphasis added].  The Babylonians weren’t prophesying about Christ’s occupation before beginning his ministry. They actually named it after one of their own gods.

My son, who’s gone through two astronomy courses and earned his astronomy merit badge, also picked up on a few inaccurate statements like “Ursa Major is the Big Dipper.”  The Big Dipper is actually an asterism, or pattern of stars that form part of a larger constellation.  In this case the Big Dipper makes up the tail and hindquarters of the much larger Big Bear (lit. Ursa Major).

So while I wouldn’t use Star Chronicles alone as a Bible-based Study of the Stars, I do think it makes a great Star-themed Study of the Bible.  If you were doing a unit study on astronomy, you  could use this for your Bible time.   And this spring, when we go out to find new constellations in the sky we’ll discuss any Bible stories or verses that come to our mind along with the mostly mythological sources for the constellation names.


Star Chronicles: A Bible-Based Study of the Stars is available in Paperback or PDF Download (look at the graphic for a coupon code good for the PDF version only thru 4/20/14)

Paperback (8 1/2 X 11, full color) available at: CreateSpace ($25): https://www.createspace.com/4730823          

PDF ($12): http://foglemanforerunner.com/star-chronicles 


Coloring in PDF images


I’d like to start this post by thanking Amy Pak (from Home School in the Woods) for giving me permission to use her products during this tutorial.  We’ve been using her Time Travelers series as part of our history study this year.  As much as we love the reading, lapbooks, timelines, etc. there is one area my son finds less than appealing—coloring in all the hand drawn images.  Of course you aren’t required to color anything, but it does make everything more appealing to the eye.  So we’ve been importing images into Photoshop Elements and colorizing them there. Then, we’re not only studying history but getting some computer graphics skills as well.  Let’s start with a big project—the Battle Blitz game from The American Revolution Time Traveler.  The folder game is made up of two PDF files (one for each side of the folder game). select-file


After putting the CD-ROM in my computer, I select File>Open and browse to my disk drive.  The file folder I want it PDFs/Lesson-Masters/M-19-1-BattleBlitz-1 .  You can see a thumbnail preview at the bottom.


picking-page


The Time Travelers files are arranged with one page per PDF file, but Photoshop Elements can pull one page or several from a file so we have to go through another pop up window.  There’s only one page to select here, but you can see a sample of a multi-page file in my Lapbooking tutorial from last year.


We finally have the page loaded in our work area.  You can see a portion of the page has a gray/white checkerboard pattern which only means it’s transparent on screen.  It’s a little distracting visually (especially when we start working up close) so I’m going to pull the whole image onto a new file with a white background.  Important Note:  Be sure and immediately Save your file with a NEW NAME (Save As) so you don’t lose your original image.

Battle-Blitz-as-imported

The easiest way to change colors is with the Paint Bucket Tool (it really looks like a tipping paint bucket spilling blue paint).  After clicking the tool, the curser also changes to a paint bucket (but black and white).  The key is the very tip of the spilling paint of the curser.  Whatever color it rests on when I left click the mouse will be turned to the selected foreground color.  And all the contiguous pixels of the same color will also be changed.  It’s probably easier to demonstrate by changing the word “Blitz” from black to red.


First I’ll change the foreground color…In the lower left corner you’ll see two overlapping squares (in the picture above one is green and one white).  If you click your mouse in the square a window will pop up and you can pick any new color. First click on the general color in the rainbow column and then pick somewhere in the large square for something specific.  In this case I want to make the word Blitz  bright red.


With my red color in the foreground and the Paint Bucket Tool selected, all I have to do is click the mouse when the tip of the spilling paint is on the object I want to recolor.  Below the letter B has turned red, but the other letters, while the same color, are not touching the B so they remain black. I’ll have to click on each letter (or part of a letter like the dot of the “I”).

After coloring in the title, I’m going to work on the water portions of the map with a nice light blue.  You’ll notice that as long as the wave lines don’t form an entire loop, the water color will fill the lakes to their edges.  We can run into a problem though if the area isn’t enclosed—look at the lakes around the Battle Blitz logo.  The edges near the box aren’t enclosed.  When we click to change the white to blue, that blue color will be carried to any contiguous white pixel and we’ll end up with the whole map colored blue (see below).

When this happens, the first step is to  choose Edit>Undo.  Then we need to draw lines to enclose the areas we want to color.  I switch to the brush tool and select a small pixel size (2-3 works fine), and draw a small line to connect the edges of the lake –I can keep the same color I’ve chosen for the water.


I’ve got to do that with each water area.  Sometimes you’ll need to really zoom in to 200 or 300 % so you can look for the gaps.  For example, when coloring in the ocean of this map I had gaps where the labels for New Jersey and Delaware crossed the shoreline.  With a little patience, I got the map colored (and the green arrow at the start).  Then I turned my attention to the flags around the border.

Notice how we run into the problem with the color bleeding into areas where we don’t want it again, in this case the stars in our field of blue.  These flags will be so small when printed, I don’t worry about drawing lines to enclose shapes.  I just switch the foreground color to white and use the brush tool to click where the stars should be in the pattern.

Now no one, least of all my son has the patience to color in all the flags around the page.  We’ve only got to do each once and then we can copy and paste for the other images.  I use the Rectangular Marquee tool (the dashed line box under the eye dropper) and click and drag over the flag and banner.  Then I choose Layer>New>Layer Via Copy.  With my new flag layer I need to erase the area where the battle and date are listed.  I do this with the Eraser Tool (it looks like a pink eraser).  I’ve hidden the white background in the image below so you can see the areas are transparent – the names of the other battles will show through. 

Then I copy this layer over and over (Layer>New>Layer Via Copy) as needed, moving it to the correct squares and rotating the image to match the layout.  I went over the process to rotate and flip layers in last year’s post on Lapbooking.   When placing the new layer over the old one, it’s often helpful to temporarily reduce the opacity so you can really align your images.  If you look to the layer section of the screen, you can see a place to adjust the opacity (normally 100%).  After aligning the images, return the opacity to 100%).

Yes, this is some work, but I count this time as computer skills/graphic arts on my son’s transcript—that’s a marketable skill in the business world.  Here’s our finished game board.

Tomorrow, we conclude our 5 Days of Photoshop for Homeschool with another, more subtle coloring technique so be sure and stop back.  In the meantime, check out some of my Crew mates 5 Days of … posts or click on the graphic to see all the participating blogs.

Beth @ Acorn Hill Academy ~ Nature Study
Aurie @
Our Good Life ~ Photography Tips and Tricks
Dinah @
The Traveling Classroom ~ Tips for Learning a Second Language
Julie @
Nurturing Learning ~ Art Resources
Tara @
This Sweet Life ~ Preparing for a New School Year
Sara @
Embracing Destiny ~ Purposeful Living
Rebekah @
There Will Be a $5 Charge for Whining ~ Culinary Adventures for Boys
Hillary @
Our Homeschool Studio ~ Fitting in the Extras

April Blog Hop

Wednesday, April 9, 2014

Photoshop Elements and the Daily Bugle

Note: If your just joining the five day series, you need to go back and read Day One and Day Two because we’ll be using the techniques we learned then today.  Also, thank you to Amy Pay of Home School in the Woods for her permission to showcase projects from The American Revolution Time Travelers CD.


This year we’ve been using several of the Time Travelers CD’s  as part of our history study.  One of the review tools created by Amy Pak is a newspaper of sorts.  The master PDF pages are to be printed out and assembled for the student to write on and illustrate.  Unfortunately for me, my son dislikes drawing and hates writing even more.  So I set about to see if we could add type and images to the PDF files with our Photoshop Elements---and it worked!  We have our newspaper for review of history facts for now and my son is picking up some practical (and marketable) computer skills in the bargain.  So let me show you how it’s done….


After putting the CD-ROM in my computer, I select File>Open and browse to my disk drive. The file folder I want it PDFs/Lesson-Masters/M-2-1-DailyBugle-1 . You can see a thumbnail preview at the bottom.


The Time Travelers files are arranged with one page per PDF file, but Photoshop Elements can pull one page or several from a file so we have to go through another pop up window. There’s only one page to select here, but you can see a sample of a multi-page file in my Lapbooking tutorial from last year.


The first page of the Daily Bugle opens in our work area. Important Note: Be sure and immediately Save your file with a NEW NAME (Save As) so you don’t lose your original image. Now if you’re like me, you’ll find that checkerboard background distracting.  All that means is that the background is transparent (in other words nothing will print there, leaving the paper blank).  Too make it easier on the eyes I’m going to use the paint bucket tool to “pour” white color over the background.  We’ll cover this feature more in tomorrow’s post on coloring PDF’s.  This won’t effect our printed paper at all—just save us some eye strain.

First let’s add a picture to that transparent box left on the right side of the page.   I found an image of the Boston Tea Party, but let’s define the space where it’s going to go using the Rectangle Tool (see Day One’s post if you need to review the procedure).


Rather than set a fixed size (since I don’t know it), I’m going to select the Unconstrained option and hold and drag my mouse over the area.  The shape will automatically be placed on its own layer above the background.


Then I will open my saved Boston Tea Party image, drag it up into the work area and use the Move Tool to position it over my blue shape.


The landscape image is too big for my space.  After I using the clipping mask (see Day Two) I can resize and nudge the image around and focus on the tea being dumped from the ship.


Now it’s time to work on the text.  We’ll put another rectangle shape over the lined area meant for writing – this time I’ll make it white.  Because this is going to be a considerable amount of writing—more so than the sentence we used on Day Two’s flash cards, I would have my son type his story into a Word document first.  That way we can use spell-check, etc.  I’ll just show you how to import the text.

First I highlight the paragraph written in Word , right click on it and choose Copy.

In Photoshop Elements, I’m going to select the Type Tool (the big T) and choose the font, size, color and alignment I want (this is covered in more detail in last year’s Day 3 post).  I’m going to select a small font size to start because I can always make it larger.  Then  I  click the mouse near the top of the white rectangle shape.  You should see a vertical black line blinking (I can’t use screen capture to show you because the cursor always disappears).  Then I right click the mouse and choose Paste.  The text will appear and wrap itself in the defined shape.

You can see I’ve got plenty of white space left so I’ll enlarge the font. With the Type Tool still selected I’ll click anywhere over the text –this will keep me in the same text layer instead of starting a new one.  Then I can click and hold the mouse and drag it over the entire paragraph to highlight it (It will now appear white on a black background).


With the text highlighted, I can go to the top of the screen and click on the down arrow next to the font size.  I’ll keep selecting the next larger size until I find one that fills my space.  When there start to be bigger gaps between predetermined sizes (say a jump from 48 to 60 pts) you may prefer to type in a number.


Just repeat these steps to fill in the other side of the page and you’ll end up with something like this.

Like it?  Did you notice the title and the flag had been colored in?  We’ll be learning how to color in PDF files tomorrow so come back.

In the meantime, check out some of my Crew mates 5 Days of … posts or click on the graphic to see all the participating blogs.

Beth @ Acorn Hill Academy ~ Nature Study
Aurie @
Our Good Life ~ Photography Tips and Tricks
Dinah @
The Traveling Classroom ~ Tips for Learning a Second Language
Julie @
Nurturing Learning ~ Art Resources
Tara @
This Sweet Life ~ Preparing for a New School Year
Sara @
Embracing Destiny ~ Purposeful Living
Rebekah @
There Will Be a $5 Charge for Whining ~ Culinary Adventures for Boys
Hillary @
Our Homeschool Studio ~ Fitting in the Extras

April Blog Hop


Related Posts Plugin for WordPress, Blogger...