Tuesday, May 31, 2011

The Science of Disney Imagineering: Fluids


As we get into the heat of summer (and hasn't is come early this year?), we mom's are often reminding our kids to get plenty of fluids.  Thanks to our latest Imagineering DVD I have learned that "fluids" and "liquids" are not the same thing--at least not from a scientific point of view.  A fluid is a substance whose molecules flow freely and takes the form of the container holding it.  This is often a liquid, but could be a gas or something a little harder to descibe--like toothpaste.  This DVD seemed a little more mature--that is fewer sight gags,  cartoons,  etc.  (There is one quick reference to flatulance with an accompanying noise).

Asa's Invention:  The Pneumatic Food-Matic 5000.  The workspace is filled with tubing as Asa tries to bring food to hungry park guests who may not be near an eating establishment (is that even possible in Disney World?)  Working like those tubes at the bank, a small capsule should deliver a hamburger from the kitchen as the fluid (in this case, air) flows from high pressure to low pressure.  Of course, it needs a little tweaking.

Defined Terms:  Fluid, Fluid Dynamics, Archimedes Principle, Neutrally Buoyant, Pressure, Hydraulic System, Mechanical Advantage

Disney Rides and Attractions that exemplify the theme:                                                                                                                                                                         

While the principle is true for all the themed vessels in Disney's flotilla, we focus on the Mark Twain Riverboat.   How can something that weighs so much float?  Asa has a large container of water and a wooden cube that floats.  A metal cube of the same size sinks to the bottom.  In order to make the metal object float we need to change it's shape to displace more water.   When the weight of the water being displaced exceeds the weight of the object it will float.  By flattening out the bottom and raising the sides, the boat pushes away more water, but the additional volume holds air which doesn't add to the weight.  

If you want to see a lot of fluid, it's hard to find more in one spot that the Living Seas with Nemopavillion at Epcot.  This is one of the biggest single aquariums in the world.  Asa learns about theprinciples of buoyancy with a scuba diver in the big tank.  First he needs to add weights to his weight suit to overcome the natural tendency to float.  Then he either adds air or releases it from his buayancy compensator vest to ascend or descend in the water.  He can also stay at a stable level (neutral buoyancy).  Some fish have built in swim bladders to accomplish the same thing.  Others, like a shark, would sink to the bottom if they stopped swimming.   There is also an experiment with an empty milk jug showing how pressure increases on all sides as you go deeper in water.  Interesting note:  the large windows of the tank are six inches think at the bottom than the top and are only held in place by the pressure of the water.

Sometimes it may not be so obvious that fluids are involved in a Disney attraction.  Take the Dinosaur ride and Animal Kingdom.  This ride takes place in a car--no water in sight.  If you could peel away the "skin" of the large audio-animatronics you would find hydraulic pumps at work.   The uncompressible liquids being force through small tubes are capable of applying thousands of pounds of pressure and move the limbs and necks of the massive creatures.  Disney is very reluctant to ruin the "magic" for anyone so they don't actually show the animatronics without its covering, instead it's explained with a cartoon image.

The last ride is Grizzly River Rapids in California Adventure (although it could be Kali River Rapids in Animal Kingdom).   The imagineers can control the speed of the circular boats by changing the width and depth of the channel of water.  They also use "turbulators,"  or obstacles on the bottom of the channel to create the whitewater on the top of the water.


Quiz: 15 questions.  If you get one wrong you will view a clip containing the correct answer before being given a chance to answer the question again.

Try It Yourself:  Two great experiments this time and easy to accomplish at home.  The first has been performed by magicians around the world.  It turns out it's science not magic!  Take a glass and fill it with water to the brim.  Place a paper plate over the top and invert the two together, then remove your hand from under the plate.  The plate will "stick" to the glass and the water won't fall to the ground because the air pressure on the outside is greater than the weight of the water in the glass.

The second experiment is to discover how long a straw you can build and still be able to suck water up through it.  Using soda straws and duct tape see if you can lift water up the stairs of your home or from a high deck to the ground.  It turns out the most you can do is about 33 vertical feet.

We're reaching the halfway point in the Imagineering series and are loving everyone.  I really hope you try to get these through inter-library loan.

Friday, May 27, 2011

Review: Read For the Heart

Hello, my name is...well I blog anonymously so I'm not going to tell you my name.  Lets just skip ahead to the part where I confess to being a book-aholic.  I'm the kind that waits in line and pays a premium to get first dibs at a used book sale.   I'm the kind the moving men despise when they lug box after box marked "Books" onto the van.  I can't fall asleep at night without reading a few pages.   There are others in my family with the reading bug.  When we go visiting we always carry a bag or two of books to pass on.  Imagine my dismay then to discover I'm part of a dying breed.  My last review for this Homeschool Crew voyage is the book Read For the Heart  published by Apologia.  In it, author Sarah Clarkson cites that less than half of adults in America now read literature.  Even worse, less than a third of 13-year-olds are daily readers (how does this bode for our future)?

In addition to facts about our literacy problem, the first section of the book covers the authors passion for reading, fond memories of family read-alouds, and ways to encourage reading in our young people.  Sometimes I found Ms. Clarkson to wax on a little too poetically in her reminisces.  For example:
A winter's eve has come.  Dusk is tapping at the windows as a fire snaps and sings from the hearth. Shadows spring dramatically around the ceiling as I nestle into the toastiet corner of the couch, a mist of hot-chocolate steam encircling my face. My siblings and parents settle in around me, my mom lighting a candle as my dad flips hes way to the bookmark in our latest family read aloud.

I don't know if her purpose is to show a well-read person had larger vocabulary or trying to prove that family read aloud time can provide heart-warming, lifetime memories.   Reading by candlelight... really?  I had to read by an oil lamp during this week's power outage and I found it extremely hard on the eyes.   Since I'm already on board with the whole "reading is important idea", I skipped ahead to the heart of the matter-- the lists of recommended books !   The remaining chapters were dedicated to specific genres:

  • Picture Books

  • The Golden Age Classics

  • Children's Fiction

  • Fairy Tales & Fantasy

  • History and Biography

  • Spiritual Reading for Children

  • Poetry

  • Music, Art, and Nature


Each chapter is organized alphabetically by author (the history section is organized by era and then by author).   The title, publication date and recommend reading level of their key works are followed by a one-paragraph synopsis (usually just one or two titles per author).  Occasionally, there may be a caution about bad language or situations that may disturb younger readers.   There may also be a list of some of the author's other titles but with no elaboration. 

This book about books  is written by an unabashed Christian and published Apologia, known for its science curriculum but branching out to publish other helpful homeschooling titles.   That should give you a clue to the types of books included here--God honoring if not necessarily Christian in content.  They  could be considered "Living Books" by those with Charlotte Mason tendancies.   I've found the last six titles I'd used as read-alouds within the pages: The Wheel on the School, Mr. Popper's Penguins, Sign of the Beaver,  Trumpet of the Swan, and A Cricket in Times Square.  (Can you tell our science theme was birds and insects?)  I also found old favorites from my own childhood like the All of a Kind Family series and Twenty-One Balloons.   You can read the Golden Age Classics chapter on Apologia's website.

The appendices are filled with more book lists--Caldecott Medalists (distinguished picture books), Newberry Medalists (distinguished children's literature), G.A. Henty titles, Landmark History Books, The Trailblazer Series, and a list of the author's personal favorites.     Keep in mind that the first two categoriesare awarded by the American Library Association, an orgainization with liberal leanings and a worldview that may not match your own, so you may want to preview these books before handing them off to your children.

The beginning of my review may have sounded like I was entering a twelve-step program for an addiction to books.  The truth is, I don't want to be cured!   Nothing better to feed the need than a book about more books (that's like a book to the second power, right?)  For it's $17 price tag, this should give me ideas to feed my habit and encourage my son's growth for some time to come.   You can read what my fellow Homeschool Crewmates think about Read For The Heart by clicking here.
Disclaimer:  I received a free copy of Read For the Heart for the purpose of completing this review.

Tuesday, May 24, 2011

Power Restored

Just got our power back after the storms went through yesterday.  We had been at Homeschool Field days--nearly 90 families gathered at the local park for races and contests and some serious picnicking.  I had been working in the makeshift nursery in the large pavilion when someone got a phone call about a storm headed our way.   A lumberyard next door offered to let us take shelter in one of their large pole barns.  I have to say even for a homeschool group, I was extremely impressed by how well the kids obeyed instructions and stayed calm.   The older kids helped to gather play equipment while the younger ones stayed in their teams in the pavillion and waited for their parents to get them.  Schnickelfritz and I decided to skedaddle back home ahead of the storm.  Those that chose to stay at Field day wisely chose to seek shelter in the pool's showerhouse.  Trees snapped in the park and part of the lumberyard's roof was peeled off.

And what did we do with no power?  Fortunately we believe in non-electronic entertainment.  We have a cabinet full of board games and more books than ought to be allowed.  We read an entire Hank the Cowdog book--I'd read one chapter and the Fritz would take a turn.  Of course he'd get to laughing so hard he couldn't continue so I had the pick up the slack.   We finished as there was just barely enough light to read the page.  The worst of it was not having water--no electricity means no well pump.  Schnickelfritz was a little worried about sleeping in a totally dark house but I said we needed to see it as an adventure and a remind

Thursday, May 19, 2011

Review: Wordy Qwerty


Last fall, Schnickelfritz and I reviewed a program called Talking Fingers.  Fritz had a great time "playing" and I was impressed that he learned a skill I hadn't even thought to teach him yet.  When we learned we were going to review the follow up program, Wordy Qwerty, we were both eager with anticipation.  The software is geared towards 7-10 year olds that already have keyboarding skills. 


Find the Pattern:  Qwerty and MIDI  explain that the student will need to type a series of ten words based on the pictures displayed.  After typing the word the student assigns it to the left or right column--one side might contain words where the letter c makes the /s/ sound and the other has c making the /k/ sound.  After all the words are in place the characters describe the pattern that has emerged and define the spelling rule.    If the student makes an error typing the program will give an auditory command which letter to type next and a small graphic will show which finger should be used to strike the key.  If the error comes in assigning the word to a column, there is a short buzz and the student can try again.  Sometimes one column fills up quickly and the student will know that all the remaining words must go under the other column.  Fritz was familiar with most of the spelling rules before this exercise, but I wonder if someone unfamiliar with the words would find the guessing before learning the rule frustrating.


Karaoke: The spelling rule from the first activity is enforced in a song.  You can read the lyrics while you listen.   Fritz has a strong auditory learning style and we've been able to memorize many facts put to music: the books of the Bible, multiplication tables, and parts of speech.  These songs had a more jazzy, funky feel to them and didn't appeal to him at all.  After hearing the song once there is an invitation to replay the music karaoke style--my son't answer was always an emphatic "No!"


The Recycler:  Another word game with two columns, both headed with the ending parts of words that sound identical but are spelled differently ( "ANE" and "AIN" for example). The wheel spins and different word beginnings are put in place.  The student must decide if the left or right  spelling is correct, putting a star by that word and leaving the other in shambles.   Fritz could usually pick one correct spelling but but on rare occasions both were correct (like "VANE" and "VAIN")  and he use usually unfamiliar with one of those words.   After filling the columns a vacuum sucks away the debris and the correct words receive a star (showing you what you may have missed).  Fritz declared this his favorite activity.


Pop-A-Word:  The student hears and sees a four-word sentence.  When the sentence disappears, the individual words that made it up are displayed on colorful balloons for random times and positions across the screen.  You must pop the balloons by clicking on them in the right order.  Be careful though because not all the words are correct.  Some words may be missing their apostrophe ("isnt" instead of "isn't").  Others are homophones for the word you seek ( "there" or "their").  Sometimes the words start with the same letters ("June" or "juice").  Click on the wrong word and you'll hear a buzz, and in the mean time the word you needed has disappeared and you must wait for it to cycle around again.  I credit this game with helping to improve Fritz's  reading by leaps and bounds.  In the past he often just read the beginning of the word and then would guess, often choosing the wrong suffix.  Now he's learned he must read the complete word  (and quickly) to get the best score.  I would have thought this was his favorite activity because it was the only one he'd repeat to try and get a better score, but he didn't like that it was a timed game.


Write Stories:  The screen displays two lines of rhyming text.  While listening to them being read, the student should also study the bottom line for spelling, capital letters and punctuation because it will disappear.  Then the student must type to recreate the second line.  When he's successful a picture will appear illustrating the story.   It is possible to see and hear the sentence again if necessary and the program will prompt which letter to type next if there is an error.

This is where I realized my biggest error.  After completing Talking Fingers for our review last fall, I did not schedule any typing practice for Fritz.  He was much slower and often picked up his hands rather than just moving his fingers to reach for letters.  I guess I just take the muscle memory of typing for granted but he still needs exercises to make this skill automatic.  Wordy Qwerty is not really about typing instruction.  The suggestion on the website is to repeat Talking Fingers but don't allow the student to look at their hands while they type.


Read Stories: The student reads about four screens worth of a short story.  Sporadically throughout the text he will be asked to select one of three words that best completes the sentence.   There isn't any trickery involved or the use of homophones to trick the reader about which word to choose.   A typical choice might be "Jack [jumped/swam/crawled] over the candle stick."   I had Fritz read the stories to me out loud and this is when I could see the Pop-A-Word exercises had really started paying off.

Spelling revisited:  The last activity is to retype the words from the pattern exercise.  This time you will only see the picture and hear the word and its up to you to remember the spelling rule.

The reward at the completion of each level is the opportunity to see a music machine that MIDI is building.   There's a short video showing drums, strings, and pvc pipe being put in place as you listen to drilling and hammering sounds.  Each machine takes three lessons to build and then you can watch it being played after the fourth lesson. 

Wordy Qwerty is available as an online subscription (5 years) or on a CD.  We used the online supscription with our dial up service.  We might have to wait a minute or two for the activity to download but it ran smoothly once that was done.  The subscription is $35 for one user and another 4 seats are available for additional fees.  The CD version is $35 but is NOT compatible with Windows 7.  There is a free demo available on the Talking Fingers website. 

I'd advise sitting with your child and watching them complete the exercises if you truly want to judge their progress.  You can set the number of correct answers for passing a level, but after forcing the student to repeat one level it will allow the student to continue progress even with a failing grade.  The online teacher's report only shows the percent correct for each lesson but doesn't give any details.  There is a more detailed assessment tool available on the CD.

I highly recommend Wordy Qwerty and Talking fingers.  My son sees it as a game, I see it as a painless way to learn  valuable and necessary language arts skills.  You can see what others on the Homeschool Crew think of Wordy Qwerty by clicking here.
Disclaimer: I received a free one-year online subscription to Wordy Qwerty for the purposes of completing this review. 

Monday, May 16, 2011

A bargain may be yours for the asking

My Schnickelfritz and the Toolman were both running the soundboards for both church services yesterday--at Children's Promiseland and the main sanctuary respectively.  This left me free to stop at a local estate auction.  The yard had been filled with years of collected books, tools, furniture, etc.  I was sticking around in hopes of picking up an atlas and a copy of Ken Burns' Civil War for our school when I heard the mention of camping gear over the loud speaker.  Schnickelfritz will be able to go camping with Royal Rangers next year and I've been thinking about overnight trips to other parts of our state as we cover Missouri history.  I hadn't inspected it, but I spotted a gray, nylon tent that looked promising.  Rainclouds were looming overhead and things were being sold in large lots to try and move quickly before everything got soaked.  The tent got lumped in with another and a musty sleeping bag but it still looked like I was going to get a bargain at $3.  Then another bidder asked if the neighboring hammock was part of this lot.  The auctioneer said "Sure, why not."  Suddenly a bidding war erupted as everyone wanted the Mexican blanket hammock.  Auction fever carried the price much higher than I was willing or able to pay with the cash in my purse. 

 The bidding crowd lumbered away to a collection of frog lawn ornaments and the winner bidder picked up her prize hammock, rolled it carefully and put it in the back of her truck.  I was quick to notice that she left everything else out in the drizzle and mud.   I caught up to her as she returned to the crowd.  "So you were mostly interested in the hammock?" I asked.  I got a nod.  "Would you be willing to part with that gray tent?"  The lady look at me and then back to the pile of camping gear.  I was preparing to offer to ofset some of her cost.

"Sure, go ahead and take it," she said.    Not only did I save the cost of the tent I'd bid on, but now I didn't have to deal with disposing of the junk that would have come with it.    When we set it up at home it turned out to be a 3-room, 8 X 12 tent that doesn't even look used!  Fritz wants to sleep in it tonight but I think I'll postpone buying the necessary tent stakes until the overnight temps go back up to the sixties.  The moral of the story is Don't Be Afraid To Ask.

Thursday, May 12, 2011

Review: Institute for Excellence in Writing


When it comes to teaching my Schnickelfritz, I feel I'm not the typical homeschool mom.  Subjects like math and science thrill me, I took calculus and two physics classes in college.  Its the Language Arts that perplex me.  Yes, I know how to read and write and I did well in those subjects but for the life of me I can't remember how I was taught.  It's probably just as well because I was the little girl who loved to write page after page in creative writing andmy son is the boy who'd rather build with blocks all day.  When the opportunity came up to review the products from The Institute for Excellence in Writing,  I jumped on it.  Perhaps this would be the panacea to my need for teaching guidance and my son's disdain to put pen to paper.  I won't make you wait till the end of the review--the answer is yes!

I received the Combo Kit Level A ($239) consisting of the Teaching Writing Structure & Style (TWSS) and the Student Writing Intensive (SWI) as well as a Portable Wall ($7).  We'll cover each of these in turn.

Teaching Writing Structure & Style


 Very few curricula I've come across begin with such a thorough course on teaching the teacher how to teach.  This is almost like attending a week-long seminar on Language Arts but you can do it at your own pace and in your PJs.  There is a handbook with lecture notes and sample lessons (yes, you will be expected to do exercises similar  to those you will be assigning your kids).  In the pages you will find ideas for posters and visual aids,  tips for adjusting the program for lower grades,  samples of student writing,  and a list of all the stylistic techniques you will be teaching.  These is not, however, enough material to use the handbook alone.  You'll need to view the videos to get a true understanding of the program.  There are six DVDs with the teacher workshops covering all nine units of TWSS.  One DVD, created several years later, contains tips and tricks  to using the program.  Finally, there are three DVDs showing Andrew Pudewa teaching Units 1 & 2, each to a different age audience (2nd - 4th grade, 5th - 7th grade, 8th-10th+ grade).   When you feel confident using the techniques in the program, you can use source documents from you own child's science or history curriculum as the basis to teach writing.  Your one time investment in TWSS can be used for the rest of your childs homeschooling years.  If you still don't feel sure about how to teach writing you can let Mr. Pudewa "do the talking" with the next product....


Student Writing Intensive


The Level A bundle comes with  four DVDs filmed during a four-day student writing seminar.  A binder  organizes  all the writing source documents, key word outlines, work in progress, and finished work.  The students will also be building their own reference material throughout the course and fill sections for structure models, stylistic techniques, and lists of banned words and synonyms to replace them.  A manila envelope contains all the source documents that will be used (I chose to hand them out as called for rather than put them all in the binder ahead of time).  The back side of the source documents gives the students a list of expected format and stylistic techniques to include in their composition.  This also provides the teacher with a very objective means to grade the work (assuming you give grades, I don't yet).  We're basing this on structure and style, not content so you may mark mechanical issues that need to be corrected and make sure the student has used each of the techniques they've been taught.  This package is also available in Levels B and C.   The levels are based on reading levels of source texts and speed with which the techniques are taught.  A family with multiple children of different grades could watch the Level B DVDs and the mom could substitute Aesops Fables as the source texts for younger students.

Portable Wall


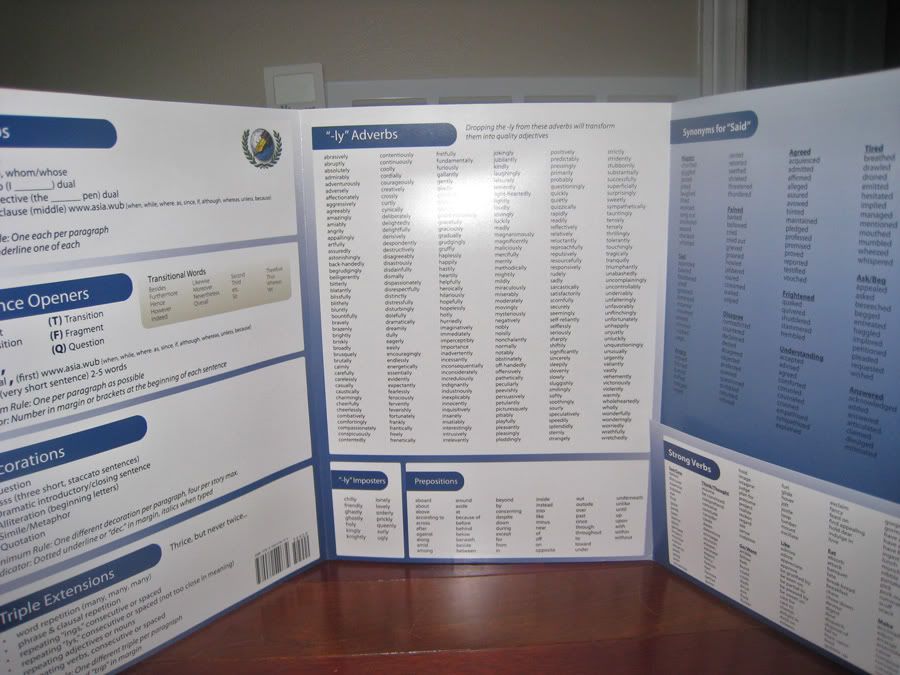
Throughout the TWSS manual are countless examples of  reminder signs you make want to enlarge and post on your walls.  They can cover techniques like remembering to double space your writing or it may be an overused word you'd like to "ban" and some appropriate replacements.   Of course there are some out there who homeschool in their dining room anddon't want guests to be subjected to 100 alternatives to the word "said" when they come over for dinner.   Perhaps your walls are already covered with nature posters and timelines or children's artwork.  If so, a "portable wall" may be of help.  The trifold structure is sturdy enough to stand on its own andmay provide a little seclusion for an intense writer.  You'll find handy reminders for each of the nine units, lists of the stylistic techniques (dress-ups, sentence openers, decorations, triple extensions),  a list of "ly" words, prepositions,  and stronger words choices to replace said, see, go, like, eat, and make.  That's a lot to cover on six pages!

So what did we actually learn you may be asking.  I'll share each of the units with you.  Some we accomplished, some we haven't gotten to yet, some were not even covered in Level A because it's just beyond the students ability at this age or because we're are still trying to make this somewhat appealing to the boy who'd rather play with blocks.


Unit 1 -  It's rather difficult to separate Units 1 and 2 in either the TWSS materials or the SWI Level A.  Technically, Unit 1 covers creating a Key Word Outline (KWO) by taking three words from each sentence in a short paragraph.  The text could be a short story (like Aesop's fables) or a non-fiction work.  The words should trigger your memory on the gyst of the sentence.   I did review the sample lesson for high-schoolers who were allowed up to four words as their sentences were much longer and more complex in structure.  Numbers and symbols are freebies andaren't included in the word count (my son loved coming up with symbols).   In the student material we never stopped at merely creating an outline but continued to Unit 2 and the reconstruction of a paragraph based on our KEO.  The TWSS manual does suggest introducing students to public speaking using the KWO as their notes.  The student looks at the key words, formulates a sentence and then looks up at the audience to deliver the sentence--no opportunity to keep their noses buried in the pages of a completelywritten out speech.   The older student sample lesson also spent more time on Unit 1 with an exercise on note taking based on a teacher's lecture.

Unit 2- The students use their Key Word Outlines as a basis to create their own paragraph.  Fritz, who has a knack for memorizing Bible verses, could often remember the original sentences verbatim--and that's all right to begin with.  This unit continues by teaching the students to make the writing their own by dressing up sentences with stronger verbs and more descriptive adjective choices.  They may combine two original sentences by turning one into a "who/which" or "because" clause.  There are six basic dress ups to be learned one at a time.  You don't move on to the next clause until you can demonstrate mastery and you are expected to use each dress-up learned in eachparagraph you write.  Some people may worry that this creates a formula for good writing.  On the contrary, some of the results were very hard on the ear--especially when my Schnickelfritz took a liking to one and would try to use it over and over again.  The point is to keep using the new skill so that just like exercising a muscle it will grow and be ready for use when needed.  Another way to provide more originality if for the student to change the setting or characters in their story.  Instead of repeating the story of a boy whose hand got stuck in a jar of nuts, Fritz wrote about a boy anda girl who found treasure in the knothole of a fallen tree.

Unit 3--We will still be creating Key Word Outlines, but instead of choosing three words from each sentence, we will be choosing words that answer the 5 W's and an H questions about a story: Who are the main characters?  Where and When do they live?  What do they need?  How do they solve their problem?  We will still be using our six dress-ups, true for all the units of the course.   The writing assignments get longer--usually three paragraphs introducing the characters and setting, explaining the problem, and resolving the conflict.  We also learn how to create an eye-catching title that ties into the final sentence of our work.  This is as far as we got in our own use.

Unit 4--This unit is a continuation of Units 1 and 2 as far as forming a KWO and reconstructing a new, dressed-up paragraph, but the source may be a much longer paragraph  or several paragraphs and taking three words from each sentence would be too cumbersome.  Now we will just focus on 4-5 details out of the many given and we may endup with 1-3 paragraphs, each containing its own subtopic.  On the SWI DVD number 3  we are supposedly covering Unit 4, but then Mr. Pudewa hands out four different articles on whooping cranes and multiple sources is really Unit 6.

Unit 5--This is not covered in Level A, but I gathered the information from TWSS.  We return to fiction this time and call on more creativity.  There is no longer a source story but a series of three pictures.  The KWO is based on facts that can be determined in the pictures.  

Unit 6-- While not specifically mentioned in our Level A material we were in fact drawing  information from multiple sources.  This appears to be as close we come  to the traditional research  paper I can remember from my school days.  There doesn''t apear to be anything covering citing sources, footnotes, or creating a bibliography so you might need to suppliment with your own teaching.

Unit 7-- It is not labeled as such, but Disk 4 of the Level A SWI really covers this material.  There is no longer a source text.  Instead, the student organizes information stored in their own noggin to write about anything!  It can take the form of a letter to grandma summarizing a recent camping trip or an explanation of why they love their dog.

Units 8 & 9 --These are not covered in Level A but are Writing Essays and Critiques respectively.  I would assume both these units would be in Level C.

This review is getting so long and there's much more to add, but I will refer you to prior postings I've done :

New series of posts — Institute for Excellence in Writing


IEW — the Yahoo Group


Adapting IEW for our family


Using IEW with other subjects


IEW: There’s no such thing as too much help


We will be using IEW again next year as we still have so much more to learn.  As for results, my son has put aside his blocks and is writing his own Hank the Cowdog story with his free time.  I feel at peace with the support IEW has given me, not only to teach the subject but suggestions in how to grade it objectively.

You'll want to check out all the products on the IEW website.  In addition to writing by Levels, there are themed source materials  (history, life science, Bible, etc.).  There are helpful articles and
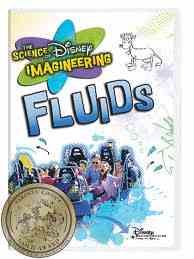
Wednesday, May 11, 2011

Spice Rack Makeover


I can't tell you how long I've owned these spices jars but they were certainly showing their age.  For cooking convenience I store them right next to the stove and years of grease splatters and other food spills have not only discolored the labels but some lost their adhesive and just slipped off.  I could have gone the easy route and just purchased a new spice rack but the frugal German in me  decided to scrounge around the house and see what I could come up with.  In the end this worked out better because I could customize the labels and fill them with the spices I use, not necessarily the ones that come in the set (as I worked on the jars I discovered some were still sealed and never been used in at least a decade--a waste of valuable counter space).


 My first thought was the Graphics Toolbox program we reviewed for the Homeschool Crew last year.  I still use it all the time for editing pictures, making lapbook components, etc.   I checked the clip art files on my computer and found a vibrant picture of some chili pepper; cute but a little too vibrant, especially when you want to add the name of the spice over the top.  GT lets you copy an image while adjusting its transparancy so I was able to make a more muted background.   I played around with text color as well--trying all of the colors from the original clip art.  In the end I decided to go with basic black since it just popped out so nicely.  I made hollow circles in the proper size to fit the lids and put them around each picture.  I printed everything on a sheet of photo paper but before cutting out each label I ran the sheet through my Scotch Laminator (to hopefully protect the new labels from grease splatter).  I chose hot lamination over my Xyron because I've learned the hardway that cold lamination doesn't hold adhesive well at all.  


 After cutting out the labels, I ran the circles through my xyron with the permanant adhesive cartridge.  And below you can see my finished results.


Thursday, May 5, 2011

Science of Disney Imagineering: Gravity

What goes up must come down.  We've all heard that saying before but this week we've actually begun to study the concept of Gravity with another Disney educational DVD.  We don't usually think about gravity because we've always been exposed to it.   The imagineers discover ways to mani

Asa's Invention:    Fond memories of watching men tossing and twirling pizza dough lead Asa to create a robotic counterpart for a restaurant in Tomorrowland.  After testing the machine several times he is left with several splotches of goo stuck to the ceiling above him and with time he is dodging the dough-bombs as they fall.

Defined Terms:  gravity, 1 G,  air resistance, friction, freefall, centrifuge, centripical force, Newton's 1st and 2nd laws of motion

Disney Rides and Attractions that exemplify the theme:

At first you may not think of Mission Space as a gravity ride but the imagineers use centripical force to alter our perceptions of gravity.  The backs of our seats begin pushing us towards the axis of the ride (simulating high g's of a launch) and when the spinning motion stops we misinterpret the lack of force as the weightlessness of outer space.  Asa does the famous spinning a bucket of water trick to model the ride.

Next we head to the Matterhorn Bobsleds, the first steel tube track created.  We learn about the need for a lift hill to take the cars up to a point where we can let gravity pull us down along a predetermined course of twists and turns.  "Falling with style" as Sherriff Woody might say.  Asa and another imagineer also discuss Newton's 1st and 2nd laws of motion.  An object in motion stays in motion--and in a straight line.  Because the curves in the track force us out of that straight line we really notice the changes when we go around corners.

Next we see a montage of other Disney coasters: Rockin' Rollercoaster, Expedition Everest, Space Mountain and Califormia Screamin'.  The imagineers discuss the best places to sit to enhance different aspects of the ride.  Everybody is going over the same track but there's something called the long train effect that makes the ride a little different from front to back.  Do you want to esperience the most g's?  Then sit in the front of Rockin' Rollercoaster.  Do you want the greatest speed going down hill?  Then the back seat is your best choice.  (Incidently, this is how I first inticed my son to try his first roller coaster.  We sat in the very front row because I knew we would be halfway down the hill before the train started to pick up speed and momentum).

And of course you know we couldn't leave the subject of gravity without talking about the Tower of Terror.  If the ride just hoisted you up to the top and let you freefall, you would travel at the same speed as your seat and it wouldn't really be that thrilling.  The imagineers attached a cable to the bottom of the car so they can pull it down faster than the force of gravity.  This makes your seat fall out from under you for a heart-stopping moment.

The Quiz:  15 questions

Try It Yourself:  Okay, this time I think the imagineers were a little too ambitious when they give us the instructions for building our own hovercraft.  It's an expensive project and my 8 year old son can't use power tools.  However, we homeschooler have been known to do some pretty crazy labs and experiments.  If your kids know how to handle shop tools I think you could earn cool parent for life points here and be named the best house on the block.


Monday, May 2, 2011

Civil War: Camp Jackson Affair

I almost labeled this post "Why I Like Homeschooling Part 4."  The reason being, since I'm not tied to a scope and sequence I can teach subjects as the opportunity arrives.  In case you're not aware, this is the first year of the 150th anniversary of the American Civil War.  For the next four years we will be treated to re-enactments of most of the battles and skirmishes that resulted in the highest loss of life of any war in American history.  Few people probably know that Missouri was the site of more of these skirmishes than any state but Virginia and Tennessee, the first occurring just eight days after the attack on Fort Sumter.

This past weekend was the re-enactment of the first Missouri involvement in the War--the Camp Jackson Affair.  Missouri was considered a "border state,"  one of the few to allow slavery but remain in the Union.   The state legislature had voted against secession, but to remain neutral--providing neither arms nor men to either side.  Governor Jackson was in favor of joining the Confederacy and had correspondence with their new government.    St. Louis had a large arsenal with over 40,000 guns and there was concern that he would give these to the Southern cause.  A shipment of  howitzers, siege guns, rifles, and ammunition was sent from Louisiana to the Missouri militia in hopes that they could seize the arsenal.  The shipment arrived in crates labeled "Tamoroa marble."  Union Captain Nathanial Lyon used a force of 6000 volunteers (mostly newly arrived German immigrants) and army regulars to capture the militia before the plan was carried out.   Sadly as the surrendered militia was marched through St. Louis, the watching crowd hurled rocks and insults at the German volunteers.  Just like the Boston Massacre, no one can say for sure what happened next but the end result was 28 spectators killed and 50-75 more wounded.

Schnickelfritz and I didn't watch the actual re-enactment (women and children were killed) but we enjoyed a morning of period music, cannon fire, education, and espionage!


A re-enacting family take time to get a family portrait using real tin-type photography.  You can see the arm of one of the devices designed to help them hold still for the five minute procedure sticking out behind the boy's back.  Thank goodness for instant digitals!


We encountered this "grieving widow" several times on our adventure.  Fritz always hid behind my back when she was near.  At first I assumed this was the same way some kids are frightened by clowns or theme park mascots.  But as I studied her closer I noticed this lady was "packin' heat" and there was a bearded face under the veil.

   It seems we'd encountered Capt. Lyon in disguise as he gathered intelligence on the Militia Camp.  Rumors have said that he did disguise himself as a farm woman in order to spy.  His photographs show him with a beard so perhaps he did have to hide his face behind this deep black mourning veil.  I bent down to whisper to Fritz and let him in on the secret and from then on he was intent on following the "Widow" around and see what would happen next.  As the couple walked away from the militia camp my son ran up to ask if it was indeed Capt.  Lyon.  Placing a finger over where his mouth would be, the figure gave a silent nod.  (Note to future spies: if you are going to disguise yourself as a widow, be sure to cover your hairy hands with gloves.  Some of the militiamen thought you had a glandular problem).

The widow and her escort quickly discovered a guarded tent.  They tried to discover why a crate of marble would need such protection.

Such attention to detail.

A member of the Illinois Artillery Company D lent Fritz his hat for this picture.  If you take your kids to any event you may want to bring hearing protection as it was quite loud.


This gentleman is a fine example of the passion and attention to detail that these re-enactors have.  He is giving a lecture on the history of ammunition and creating realistic (but dummy) cartridges for the soldiers to carry in their ammunition cases (that will probably never be seen by the viewing public).

As I said, Camp Jackson is just the start of the conflict so you've got plenty of time to check with your states tourism division and see if there are any Sesquicentennial events in your state.
Related Posts Plugin for WordPress, Blogger...